Auto-darkening welding helmets under $200 offer serious protection and practical features for hobbyists, fabricators, and small shops without breaking the bank. This article examines how AD helmets work, the safety and performance specs to prioritize, top models you can buy in 2024 under $200, maintenance tips, and answers to common buyer questions to help you choose the best PPE for your needs.
Why auto-darkening helmets matter for safety and productivity
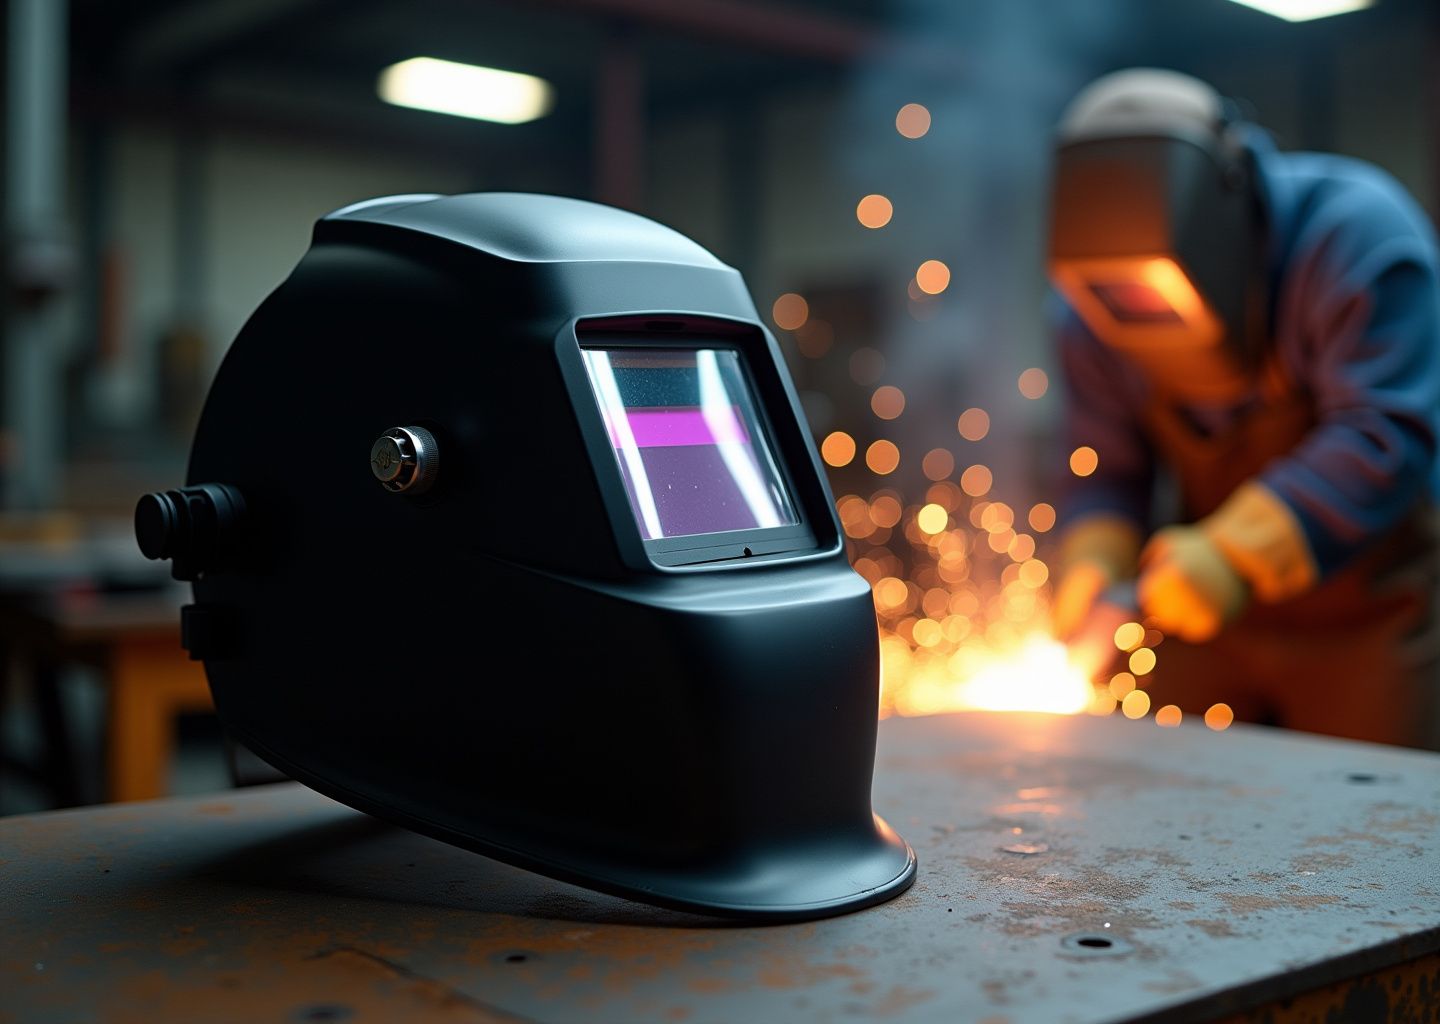
For anyone who has ever used a traditional fixed-shade welding helmet, the routine is second nature. You line up your torch or electrode, get everything perfectly positioned, and then give a sharp nod to snap the helmet down just before striking an arc. This “helmet nod” is more than just a classic welder’s move; it’s a constant interruption. It’s a moment where your carefully placed torch can drift, costing you precision and time. Auto-darkening (AD) helmets eliminate this clumsy ritual, and in doing so, they offer transformative benefits in safety, accuracy, and overall productivity that are essential for everyone from the weekend hobbyist to the full-time fabricator.
The most immediate advantage is an uninterrupted workflow. With an AD helmet, the lens remains in a light, transparent state (typically a Shade 3 or 4) until you start welding. You can see your workpiece clearly, allowing you to set up your joint, position your MIG gun or TIG torch with pinpoint accuracy, and prepare for the weld with the helmet already in place. The moment the arc ignites, the lens darkens to your pre-selected shade in a fraction of a second. This seamless transition means you never lose sight of your starting point. The constant cycle of lifting and lowering a helmet is gone. This not only saves time on every single tack and bead but also significantly reduces neck strain and fatigue over the course of a project or a workday. For anyone spending hours under the hood, this ergonomic benefit alone is worth the investment.
This continuous visibility directly translates to better weld quality. Starting an arc in the wrong spot is a common mistake with fixed-shade helmets, leading to misplaced tacks, messy bead starts, and potential burn-through on thin material. With an auto-darkening helmet, you see exactly where your electrode or wire is right up to the instant the puddle forms. This is particularly critical for TIG welding, where precise arc initiation is fundamental to a clean, strong weld. For MIG and stick welding, it means less spatter from a poorly established arc and a much lower chance of the electrode sticking. By minimizing these small but frequent errors, an AD helmet helps produce cleaner work, reduces the need for grinding and rework, and ultimately saves on costly consumables and materials.
Beyond workflow and quality, the safety implications are profound. Any welding helmet lens certified to the ANSI Z87.1 standard provides 100% protection against ultraviolet (UV) and infrared (IR) radiation at all times, whether it’s in a light or dark state. The real safety advantage of an auto-darkening helmet is behavioral. The inconvenience of a fixed-shade helmet often tempts welders to perform a quick tack weld without flipping the helmet down, exposing their eyes to the intense flash of the arc. This exposure, even for a split second, can cause a painful condition known as photokeratitis, or “welder’s flash,” which feels like having sand in your eyes. According to the Occupational Safety and Health Administration (OSHA), thousands of workers experience serious, preventable eye injuries on the job each year, with welding, cutting, and brazing being high-risk activities. By making it effortless to always have protection in place, auto-darkening helmets drastically reduce the likelihood of these accidental exposures. They encourage safer habits by removing the very inconvenience that leads to dangerous shortcuts.
For hobbyists, this means a safer learning environment with a much shallower learning curve. For small shops and professional fabricators, the benefits compound. Increased productivity from a smoother workflow, higher quality welds with less rework, and a safer environment that reduces the risk of injury all contribute directly to the bottom line. The investment in a quality auto-darkening helmet pays for itself quickly through efficiency gains and the prevention of costly mistakes and potential downtime from injuries. Models from brands like Arccaptain and YesWelder have made this technology more accessible than ever, proving you don’t need to spend a fortune to get professional-grade features.
Understanding why an auto-darkening helmet is a superior choice is the first step. The next is to understand how they achieve this technological feat. The magic lies in a combination of sensors, liquid crystal displays, and power sources, all governed by specifications that determine their performance. To make an informed choice, it’s crucial to decode these technical details and know what to look for when comparing models in the sub-$200 price range.
How auto-darkening helmets work and which specs matter most
Understanding what goes on behind that dark lens is the key to picking a great helmet. It’s not magic, just clever technology designed to protect your eyes in a fraction of a second. Once you know how an auto-darkening filter (ADF) works, the long list of technical specs on a product page starts to make a lot more sense. Let’s break down the mechanics and the numbers that truly matter when you’re shopping on a budget.
How the Technology Works
At the heart of every auto-darkening helmet is the ADF cartridge. This is a multi-layered electronic lens that sits between protective clear lenses. It combines several technologies to provide seamless protection.
First, a passive filter provides constant protection against harmful ultraviolet (UV) and infrared (IR) radiation. This is a critical safety feature. Whether the helmet is on, off, or has dead batteries, this UV/IR filter is always working. It’s physically built into the lens and doesn’t rely on power. This permanent shield is what prevents the invisible radiation from damaging your retina.
When you strike an arc, the intense visible light is detected by optical sensors on the front of the ADF cartridge. Most helmets under $200 have two, three, or four sensors. More sensors are generally better, as they reduce the chance of the helmet failing to darken if one sensor is blocked, which can happen during out-of-position welding. Once the sensors detect the arc, they send a signal to the liquid crystal display (LCD) panel inside the lens. This panel, powered by a combination of a solar cell and a battery, instantly polarizes the liquid crystals, turning the lens dark to the selected shade level. The whole process happens in a tiny fraction of a second.
Power sources for these helmets are typically a hybrid system. A small solar panel on the front helps power the lens during welding, extending the life of the internal batteries. Most budget-friendly helmets use one or two replaceable lithium coin batteries, like a CR2032. Some newer models might feature a non-replaceable, rechargeable battery, but replaceable ones are more common and often preferred for their simplicity. Finally, most modern helmets offer different modes. Weld mode is the standard auto-darkening function. Grind mode deactivates the sensors and keeps the lens in its light state (usually shade 3 or 4), allowing you to use the helmet as a protective face shield for grinding without it darkening from sparks. Some may also have a Cut mode for plasma or oxy-fuel cutting, which often uses a lower shade range.
Specs That Matter Most Under $200
When comparing helmets, you’ll be hit with a wall of numbers. Here’s what to focus on to get the best value and protection for your money.
Shade Range
This tells you how dark the lens can get. Shades are rated on a DIN scale. A typical light state is shade 3 or 4, which is clear enough to see your work area before you start. The working shade range for most helmets is adjustable from shade 9 to 13. This covers most common welding processes. For MIG and stick welding, you’ll likely use shades 10-13. For TIG welding, especially at lower amperages, a range that starts at shade 8 or 9 is ideal.
Switching or Response Time
This is how fast the lens goes from light to dark. It’s measured in fractions of a second. A common speed in the sub-$200 category is 1/10,000 to 1/25,000 of a second. Faster is always better, as it minimizes the time your eye is exposed to the bright arc. While the difference between 1/15,000s and 1/25,000s is imperceptible to the user, anything slower than 1/3,000s might cause eye fatigue over a long day. Most reputable budget helmets today offer speeds that are more than adequate for hobbyists and small shops.
Optical Clarity and Lens Rating
This is one of the most important specs for comfort and weld quality. It’s rated on a four-number scale, like 1/1/1/1. The closer each number is to 1, the better the optical quality. The numbers stand for:
- Optical Class (1): How distortion-free the lens is. A 1 means a clear, crisp view, like looking through good glass.
- Diffusion of Light Class (1): Measures haziness or clarity. A 1 means the lens is made from very pure materials.
- Luminous Transmittance Class (1): How uniform the shade is across the entire lens. A 1 means no random dark or light spots.
- Angle Dependence Class (1): How consistent the shade is when you look through the lens at an angle. A 2 here means the view might darken or distort when you look through the very edges of the lens.
A perfect 1/1/1/1 rating is the gold standard, but in the under $200 range, a 1/1/1/2 rating is very common and perfectly acceptable. It provides a clear view with only minor distortion at extreme angles.
Viewing Area Size
A larger viewing area gives you better peripheral vision, which is a huge help when you’re trying to position your torch for a TIG weld or navigate a large project. Budget helmets often have smaller windows (around 3.5 x 1.75 inches), while premium models offer massive screens. For the price, look for something that gives you a comfortable field of view without adding too much weight.
Sensitivity and Delay Controls
These adjustable settings let you fine-tune the helmet’s performance. Sensitivity controls how much light is needed to trigger the lens. You can turn it up for low-amp TIG welding or turn it down when welding outdoors in bright sunlight to prevent false triggering. Delay controls how long the lens stays dark after the arc stops. A short delay is good for tack welding, allowing you to move quickly. A longer delay is better for high-amperage welding, as it protects your eyes from the glowing weld puddle after the arc is extinguished.
Weight and Headgear
A helmet can feel very heavy after a few hours of work. Lighter is better for reducing neck strain. Most helmets in this price range weigh between 16 and 22 ounces. Just as important is the headgear. Look for a harness with multiple adjustment points and a ratcheting knob to tighten it. A comfortable, well-balanced headgear makes even a heavier helmet feel manageable.
Certifications
This is non-negotiable. Any helmet you buy in the USA must be certified to the ANSI Z87.1 standard. This ensures it has passed impact resistance tests and that the ADF provides the advertised level of protection. Look for “Z87.1” or “Z87+” markings, where the “+” indicates it has also passed high-velocity impact tests. The certification should be clearly marked on the helmet and the lens. Some may also list the Canadian CSA Z94.3 standard, another indicator of a quality product.
Recommended Models to Research
Navigating the sub-$200 market for an auto-darkening helmet can feel overwhelming, but a great helmet that balances safety, comfort, and performance is well within reach. Prices and availability fluctuate, so always verify the latest specs and costs from retailers before purchasing. The prices listed here reflect typical ranges found at major US retailers as of late 2024.
YesWelder LYG-Q800D Panoramic View
Typical Price Range: $90 – $130
Standout Features: Massive, nearly 15-square-inch viewing area with a main window and two side windows. True color technology and four arc sensors.
Pros: Unmatched peripheral vision, excellent clarity for the price, external grind mode switch.
Cons: Can feel bulky due to its size, headgear is functional but not as refined as premium brands.
Best Use Case: Multipurpose hobbyist use, especially for projects requiring a wide field of view.
Caveat: The side windows are a fixed shade, which some welders find distracting at first.
Hobart Inventor Series (770880)
Typical Price Range: $110 – $150
Standout Features: Reliable performance from a trusted American brand. Large 9.3-square-inch viewing area and analog controls for sensitivity and delay.
Pros: Durable construction, comfortable headgear, very clear lens for its class.
Cons: Lacks some of the latest features like true color, only has three arc sensors.
Best Use Case: General fabrication, MIG, and stick welding in a small shop or garage setting.
Caveat: The optical clarity is good, but it retains the classic green tint common in older ADF designs.
Lincoln Electric Viking 1740 Series
Typical Price Range: $140 – $180
Standout Features: Professional-grade optical clarity and build quality from a top-tier manufacturer. Lightweight design.
Pros: Excellent lens quality, reliable and durable, great parts availability through welding suppliers.
Cons: Smaller viewing area (6.3 sq. in.), fewer features for the price compared to budget brands.
Best Use Case: Beginners or professionals looking for a no-frills, high-quality backup helmet.
Caveat: You are paying a premium for the brand name and lens quality, not for a large viewing area or extra features.
Antra AH6-260-0000
Typical Price Range: $45 – $65
Standout Features: Extremely lightweight and affordable. Features four arc sensors and a grind mode.
Pros: Very budget-friendly, weighs just over one pound, surprisingly capable for the price.
Cons: Small viewing area (6.65 sq. in.), basic headgear, optical clarity is acceptable but not great.
Best Use Case: Hobbyist on a tight budget, occasional welding tasks, or as a loaner helmet.
Caveat: Build quality is noticeably less robust than more expensive models; not intended for daily professional abuse.
Jackson Safety Insight HSL-100
Typical Price Range: $130 – $170
Standout Features: Digital controls and excellent optical clarity. Jackson is known for comfort and reliability.
Pros: Easy-to-use digital interface, comfortable and well-balanced headgear, good for all-day wear.
Cons: Standard viewing area size (9.27 sq. in.), switching speed is adequate but not the fastest in its class.
Best Use Case: Serious hobbyists or light fabrication shops where comfort and clear optics are a priority.
Caveat: Some newer, cheaper brands now offer better on-paper specs, but the Jackson’s real-world performance and comfort are hard to beat.
ArcCaptain ClearLite X100
Typical Price Range: $90 – $130
Standout Features: Boasts a top-tier 1/1/1/1 optical clarity rating and true color technology, features typically found on helmets costing twice as much.
Pros: Exceptional clarity for the price, four sensors, lightweight design.
Cons: Long-term durability is less proven than established brands, headgear is average.
Best Use Case: TIG welding and any work where precise puddle control and color recognition are critical.
Caveat: While the lens is excellent, the overall build quality of the shell and headgear reflects its budget price point.
Where to Buy and What to Check
You can find these helmets at several types of retailers. Authorized welding supply stores like Welder Supply or Baker’s Gas often have knowledgeable staff and carry a wide range of models. Big-box stores like Home Depot and Tractor Supply typically stock entry-level models from Hobart and Lincoln. Online marketplaces like Amazon offer the widest selection and competitive pricing but require more research on your part.
When buying, especially if it’s a discounted or open-box item, always verify the return policy. A 30-day return window is standard and gives you time to test the helmet’s functions. Check the warranty details carefully. Top brands may offer multi-year warranties, while budget brands usually provide one year. A clear warranty and return policy are your best protection against receiving a defective unit.
Frequently Asked Questions
Are helmets under $200 safe for professional use?
Yes, as long as they meet the required safety standards. The most important thing to look for is the ANSI Z87.1 certification. This marking confirms the helmet has passed rigorous testing for impact resistance and optical protection against harmful radiation. While a sub-$200 helmet provides this essential safety, professional-grade models often justify their higher price with superior durability, more ergonomic headgear for all-day comfort, and better optical clarity (like a 1/1/1/1 rating) that reduces eye strain over thousands of hours. For occasional or light professional work, a certified budget-friendly helmet is a perfectly safe and practical choice. For heavy, daily fabrication, investing more can pay off in long-term comfort and productivity.
Can I use an auto-darkening helmet for plasma cutting?
In many cases, yes, but you must check the helmet’s specifications first. Plasma cutting produces a very bright arc that requires a specific shade level for protection, usually between shade 8 and 12, depending on the amperage of the cutter. Many multi-process helmets have a variable shade range that covers this. Some even feature a dedicated “cut” mode. Always refer to the manufacturer’s manual to confirm your helmet is rated for plasma cutting and to determine the correct shade setting for your machine’s output.
How long do batteries typically last and are replacements available?
Battery life can vary, but most helmets that use replaceable batteries (commonly one or two CR2032 or CR2450 lithium coin cells) provide between 1,000 and 2,000 hours of welding time. Most modern helmets also feature a solar-assist panel that helps power the lens while you’re welding, which can dramatically extend battery life. We strongly recommend choosing a helmet with user-replaceable batteries. Some of the cheapest models have sealed, non-replaceable batteries, which means the entire expensive lens cartridge becomes a disposable item once the battery fails. Replacement coin cell batteries are inexpensive and available almost everywhere.
How do I test the auto-darkening function before first use?
Never test a helmet by looking directly at the sun, as this can damage the sensors and your eyes. A safe and effective method is to use a spark lighter or the striker from a gas grill. Hold the helmet up and create a spark in front of the sensors; the lens should darken instantly. Another easy trick is to use a TV remote. Point the remote at the sensors and press any button; the infrared signal is often strong enough to trigger the lens. Before you lay your first bead, put the helmet on, look away from your workpiece, and strike a very brief arc. The immediate darkening will confirm it’s working properly. Always read the user manual for the manufacturer’s specific testing instructions.
Are after-market lens covers and parts worth buying?
Yes, especially when it comes to outer cover lenses. The clear outer lens is a sacrificial part designed to protect your expensive auto-darkening filter from spatter, scratches, and grime. It’s a consumable item that must be replaced regularly to maintain a clear view. Welding with a scratched or cloudy cover lens reduces visibility and can cause significant eye strain. While lenses from the original manufacturer (OEM) guarantee a perfect fit and optical quality, high-quality after-market lenses can be a great way to save money. For more complex parts like the headgear, sticking with OEM replacements is usually the best bet to ensure proper fit and function.
Troubleshooting Common Auto-Darkening Helmet Issues
- Flickering Lens: This is most often a sign of a low battery. The first step is always to install a fresh one. If the problem persists, make sure the arc sensors are clean and not obstructed. When TIG welding at very low amperages, the arc may not be bright enough to keep the sensors consistently triggered; in this case, increasing the lens’s sensitivity setting usually solves the problem.
- Sensors Not Responding (Lens Won’t Darken): First, check that you haven’t accidentally left it in grind mode. Next, clean the sensors with a soft, lint-free cloth. Also, be aware of your positioning; make sure your hands, the torch, or the workpiece aren’t blocking the sensors’ line of sight to the arc. If it’s a brand new helmet, double-check that you’ve removed any protective plastic film from the lens and sensors.
- False Darkening (Lens Darkens Randomly): This usually means the sensitivity is set too high. The helmet’s sensors may be reacting to bright overhead shop lights, direct sunlight, or even the arc from another welder working nearby. Try turning down the sensitivity adjustment dial until the lens only triggers from your own arc.
Final recommendations and next steps
Making the final decision can feel like the hardest part, but by now you should have a solid idea of what features matter most for your work. To bring it all together, let’s translate that knowledge into specific recommendations based on who you are and what you’re building.
Final Buying Recommendations by User Type
For the Beginner DIY Hobbyist
If you’re just starting out, welding occasionally on weekends for projects like a small workbench or garden art, your focus should be on solid, certified protection without overspending. You don’t need a helmet with every bell and whistle. Look for a reliable helmet in the $80 to $130 range. Prioritize a switching speed of at least 1/12,000 of a second and a helmet with two or three arc sensors. A viewing area around 3.9 x 2.3 inches is perfectly adequate for the work you’ll be doing. Comfort is important, but you likely won’t be wearing it for hours on end, so a standard adjustable headgear will suffice. Brands like Antra, YesWelder, and some entry-level Hobart models offer excellent value and safety for occasional use.
For the Home Shop Fabricator
You’re a step beyond the beginner. You’re in your garage regularly, tackling more complex projects like building custom furniture, working on car frames, or even doing some light TIG welding. Your helmet is a core tool, not just an accessory. You should aim for the $130 to $200 price bracket. Here, you’ll want to prioritize optical clarity and comfort. Look for helmets with four arc sensors for reliable triggering, especially when welding out of position. A larger viewing area and a “true color” lens will make a significant difference in seeing the weld puddle clearly, reducing eye strain over longer sessions. A more advanced, comfortable headgear with multiple adjustment points becomes crucial. Models from Jackson Safety, ArcCaptain, and sometimes even entry-level options from Lincoln Electric or Miller on sale fit this profile well. Check out the selections on sites like Welder Supply to see what major brands offer in this range.
For the Light Professional or Contractor
You rely on your equipment to make a living, even if you’re not under the hood eight hours a day. Your helmet needs to be a dependable workhorse. You should use your full $200 budget to get the most durable and feature-rich helmet possible. For you, reliability and warranty are non-negotiable. Insist on four arc sensors, the best optical clarity you can find (a 1/1/1/1 or 1/1/1/2 rating is ideal), and a robust, highly adjustable headgear. A longer warranty, ideally two years or more, provides peace of mind. Features like external grind mode controls can save valuable time on the job. While top-tier helmets are often more expensive, you can sometimes find excellent deals on slightly older models from premium brands or high-end offerings from budget-friendly companies that pack in professional features.
Budgeting for the Essentials and Basic Care
Your spending doesn’t stop with the helmet itself. Plan to budget an extra $30 to $50 for essential accessories and be prepared for basic maintenance to keep your investment protecting you for years.
- Accessories to Budget For:
- Replacement Cover Lenses: These are consumables. The outer lens will get scratched and covered in spatter, clouding your vision. Buy a pack of at least 5-10 right away.
- Replacement Sweatbands: A clean, absorbent sweatband makes welding much more comfortable. Having a spare is always a good idea.
- Helmet Bag: A simple drawstring bag protects your helmet from scratches, dust, and impact during transport and storage, significantly extending its life.
- Basic Maintenance Tips:
- Cleaning: Clean the auto-darkening lens and cover lenses only with a soft, lint-free cloth (like a microfiber cloth for eyeglasses) and an approved cleaning solution or mild soap and water. Never use harsh solvents.
- Storage: Always store your helmet in its bag in a clean, dry place away from direct sunlight and extreme temperatures.
- Batteries: If your helmet starts flickering or not darkening consistently, the first thing to check is the batteries. Replace them according to the manufacturer’s instructions.
Finally, remember that while this guide focuses on affordability, your eyesight is priceless. A slightly higher upfront cost for a helmet with better safety features, a clearer lens, and a longer warranty is an investment in your long-term health and productivity. Always recheck current prices and model availability before you buy, as the market is constantly evolving. Happy welding, and stay safe.
Sources
- 19 Welding Helmets Under $200 Starting at $44.94 – Welder Supply — Welder Supply offers the best welding helmets under $200 from top brands like Miller, 3M and Jackson. Shop auto-darkening helmets, passive shade helmets & more.
- 8 Best Welding Helmets (2024): Top Pick for Every Skill Level — If you're after the best auto-darkening welding helmet with unmatched optics, the Optrel Crystal 2.0 is the one to go for. I've never …
- The 7 Best Auto Darkening Welding Helmets from Arccaptain — Seeking the top auto-darkening welding helmet? · ARCCAPTAIN's ClearLite X100 and VisionMax X200 lines cover MIG, TIG, and Stick, with grind modes …
- Welding Helmets Under $150 – Baker's Gas — Get a budget-friendly helmet from Baker's and don't lose out on features or quality protection. Shop our collection of welding helmets under $150 today!
- Welding Helmet Recommendations (Auto Darkening) — The Optrel Crystal 2.0 probably has the best optical clarity followed by the ESAB A60. The Speedglas 9002NC has good optical clarity and is very …
- Top Welding Helmets of 2024 – YouTube — Best Welding Helmets of 2024 | Top Picks Reviewed! Looking for the best welding helmet in 2024? We've tested and compared this year's top …
- Best Selling Welding Helmets – YesWelder — Graphic Auto-Darkening Welding Hood. Auto-Darkening Welding Helmet. LYG-Q800D-SK Ellie J Customize Monster Graphic Auto-Darkening Welding Helmet. from 109.00.
