This article lays out the essential personal protective equipment every construction worker should have in a starter kit. We cover mandatory items, how to choose certified gear, proper fit and maintenance, and buying tips for different trades and climates. Read on for a practical, safety-first guide to building a compliant, effective PPE kit.
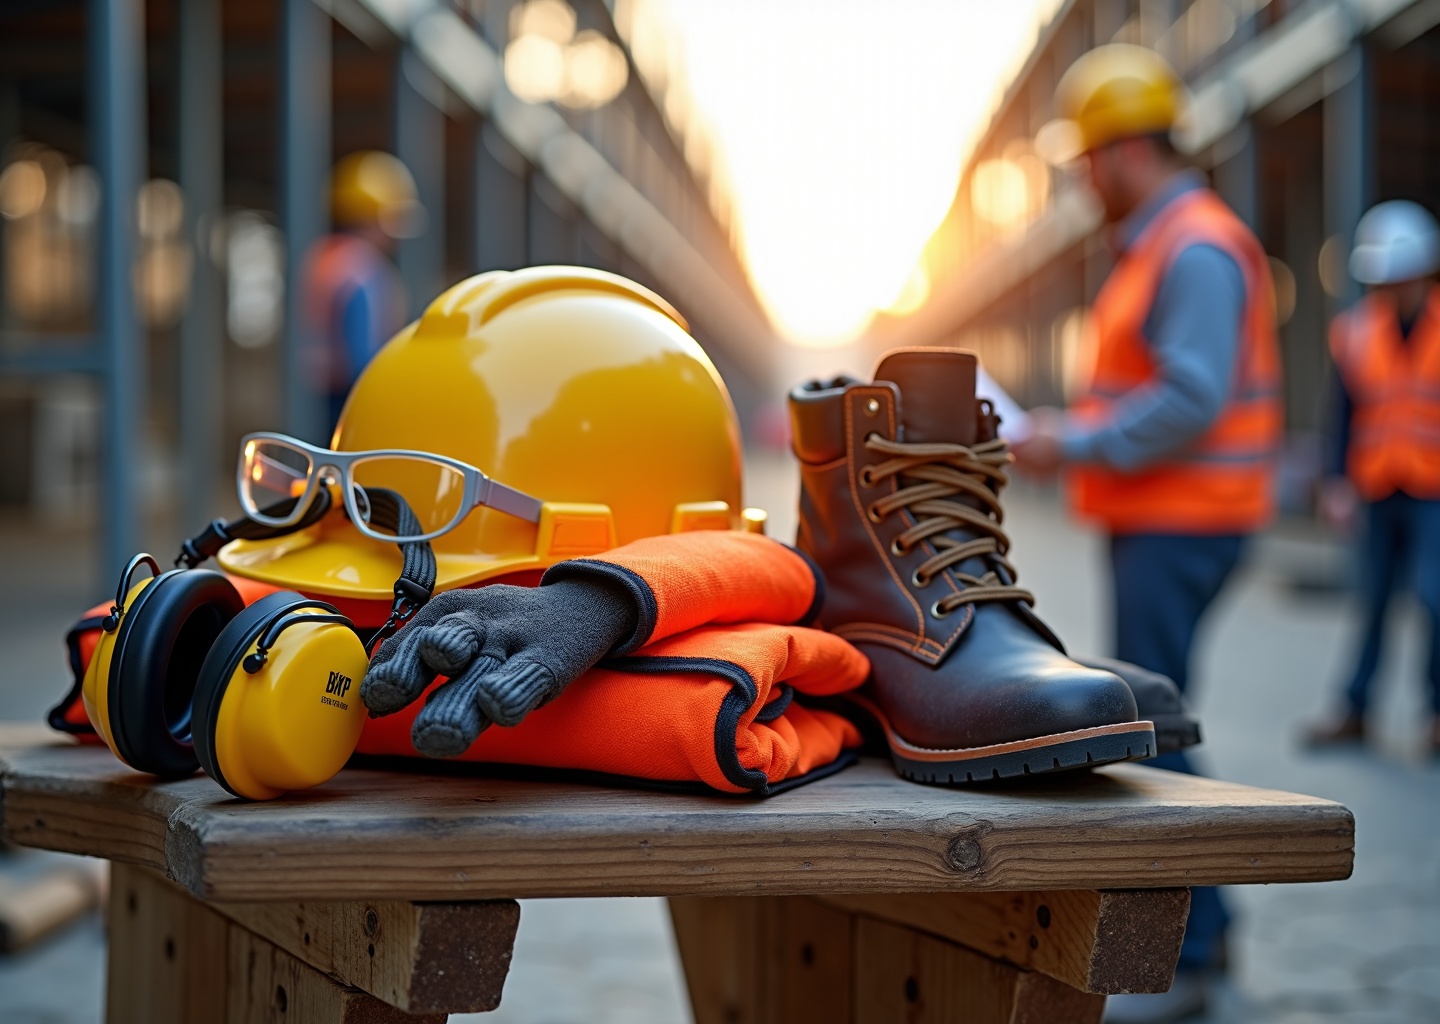
Essential head to toe PPE for construction sites
Your personal protective equipment is what stands between you and a life-altering injury. Building your starter kit isn’t just about grabbing gear; it’s about understanding what each piece does and why it’s non-negotiable. From head to toe, this is the essential lineup every construction worker needs.
Hard Hats
This is your most critical piece of PPE. It protects your head from falling objects, bumps, and electrical shock. Look for a label inside the shell that confirms it meets ANSI/ISEA Z89.1 standards. You’ll see a Type (Type I for top impact, Type II for top and side impact) and a Class (Class G for General, Class E for Electrical, and Class C for Conductive). Most general construction sites require Type I, Class G or E. The suspension system is just as important as the shell. It should be adjusted to keep a gap between your head and the shell, absorbing the force of an impact. Before each shift, check the shell for cracks, dents, or sun damage, and inspect the suspension straps for any fraying or breaks. Replace the suspension about once a year and the entire helmet every 3-5 years, or immediately after it takes a significant hit. Be careful with accessories; only use ones approved by the helmet manufacturer to avoid compromising its protective qualities.
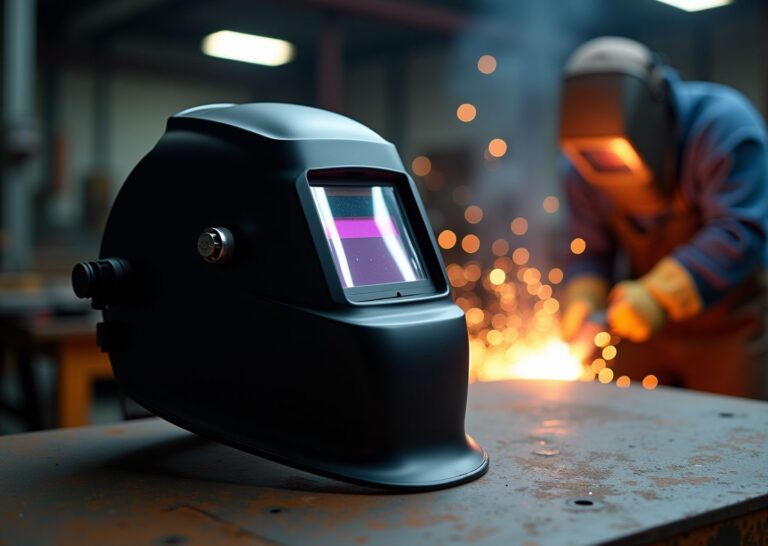
Eye and Face Protection
Your eyes are irreplaceable. Dust, flying debris, chemical splashes, and welding arcs are constant threats. Your safety glasses or goggles must be stamped with ANSI/ISEA Z87.1, which means they’ve passed high-impact testing. Safety glasses are the minimum, but for heavy dust or splash hazards, sealed goggles are necessary. A face shield provides broader protection from splashes or high-velocity particles but must always be worn with safety glasses or goggles underneath. Look for anti-fog coatings if you work in humid conditions or sweat a lot. Inspect lenses daily for deep scratches that could impair your vision and replace them when they do. When wearing a respirator, ensure your eyewear fits snugly without breaking the respirator’s seal.
Hearing Protection
Construction sites are loud, and hearing loss is permanent. If you have to shout to be heard by someone a few feet away, you need hearing protection. The goal is to reduce noise exposure to below an 85-decibel (dBA) average over an 8-hour shift. Your options are earplugs or earmuffs, each with a Noise Reduction Rating (NRR). A higher NRR means more noise reduction. Foam earplugs offer great protection (NRR 20-33) but must be inserted correctly. Earmuffs (NRR 20-30) are easier to use but can be bulky. Inspect reusable plugs and earmuff cushions for cracks or hardening. Some earmuffs are designed to clip directly onto a hard hat, which is a great integrated solution, but verify they are compatible and don’t create a gap in the helmet’s fit.
Respiratory Protection
Not all masks are created equal. Simple dust masks offer comfort from nuisance dust but provide no real protection against hazardous particles like silica or lead. For those, you need a NIOSH-approved respirator. The most common is the N95 filtering facepiece, which filters at least 95% of airborne particles. For more significant chemical or vapor exposures, an elastomeric half-mask or full-face respirator with replaceable cartridges is required. Remember, any tight-fitting respirator requires a medical evaluation and an annual fit test to ensure it creates a proper seal. Facial hair will break that seal. Before each use, check the straps, seals, and valves for damage. Store respirators in a clean, dry bag away from sunlight and chemicals.
Hand Protection (Gloves)
Your hands do the work, so they need the right protection. Glove choice is entirely hazard-dependent. For handling sharp materials like metal or glass, you need cut-resistant gloves rated by the ANSI/ISEA 105 standard, with levels from A1 (lowest) to A9 (highest). For concrete or chemical work, you’ll need waterproof, chemical-resistant gloves like nitrile or neoprene. Impact-resistant gloves have extra padding on the back to protect against crushing injuries. There’s always a trade-off between protection and dexterity. Before putting them on, check for holes, tears, or signs of chemical damage.
High-Visibility Apparel
If you’re working near moving vehicles or equipment, you need to be seen. High-visibility clothing is rated by the ANSI/ISEA 107 standard in three classes. Class 1 is for low-risk areas. Class 2 is the most common requirement for roadway construction. Class 3 offers the highest visibility for workers in complex, high-speed environments. Check the tag for the class rating and make sure the garment is clean enough for the fluorescent and retroreflective materials to do their job.
Work Boots
Your feet carry you through long days, over rough terrain, and around countless hazards. Your boots must have a protective toe cap meeting ASTM F2413 standards. Steel toes are traditional, but composite toes are lighter and don’t conduct cold or electricity. Look for soles that are slip-resistant and puncture-resistant if you’re around nails or rebar. If you work near electrical hazards, an Electrical Hazard (EH) rating provides an extra layer of protection. Check your boots daily for tread wear, sole separation, and punctures. A worn-out pair of boots won’t protect you.
Fall Protection
If you work at heights of six feet or more, a personal fall arrest system is mandatory. The basic system includes a full-body harness, a lanyard or self-retracting lifeline, and a secure anchor point capable of supporting 5,000 pounds. Your harness must meet ANSI/ASSE Z359 standards and fit you properly. As of the OSHA rule effective January 13, 2025, employers must ensure PPE fits each worker correctly, which is especially critical for harnesses. Before every single use, inspect the webbing for frays, cuts, or discoloration, and check all metal hardware for corrosion or damage. If your gear has been involved in a fall, take it out of service immediately.
Specialty and Climate Gear
Your starter kit should also adapt to your job and environment.
- Trade-Specific Add-ons: An electrician needs dielectric gloves and arc-rated clothing. A concrete worker requires alkali-resistant gloves and waterproof boots. A carpenter might need higher-level cut-resistant gloves (A4-A6) and safety glasses with better side protection.
- Climate Considerations: In hot weather, look for breathable, moisture-wicking fabrics and vented hard hats. Sun protection is key, so use sunscreen and wear UPF-rated clothing. In winter, insulated gloves and boots are essential, but they must still allow enough dexterity to work safely. Layering rain gear over your harness can be tricky, so ensure you can still access your D-ring and that the fit isn’t compromised.
How to choose and buy your starter PPE kit
Building your first construction PPE kit starts long before you step into a store or click ‘add to cart’. It begins with a clear-eyed look at the job site. The right gear is a direct response to the specific dangers you’ll face, so your personal PPE buying guide should always start with a simple hazard assessment. Walk through your typical workday in your mind. What are the risks? Are you working at height? Will there be falling debris, loud machinery, airborne dust, or chemical splashes? Make a mental list of these hazards. This initial step informs every decision you make from here on out.
Your employer is legally required to conduct a formal Job Hazard Analysis (JHA) and identify the necessary construction PPE for each task. They are also responsible for providing most of it. Since the OSHA Final Rule went into effect on January 13, 2025, employers must now ensure all provided equipment fits each worker properly. This is a significant change that puts the responsibility of finding the right size squarely on them. Always start by asking your supervisor for the site’s specific PPE requirements before you buy anything yourself.
Once you know what you need, the next step is learning to read the labels. Certifications are your guarantee that a piece of gear has been tested to meet established safety standards.
- ANSI (American National Standards Institute) You’ll see this on safety helmets (ANSI Z89.1), eye protection (ANSI Z87.1), and high-visibility clothing (ANSI/ISEA 107). The label confirms it meets specific criteria for impact, penetration, or visibility.
- ASTM (American Society for Testing and Materials) This is the key certification for work boots. Look for ASTM F2413 on the tongue label to ensure the footwear meets standards for impact and compression resistance for the toe area.
- NIOSH (National Institute for Occupational Safety and Health) This mark is exclusive to respiratory protection. If a mask or respirator doesn’t have a NIOSH approval number on it, it is not certified to protect you from hazardous dusts or vapors on a U.S. job site.
Always check for these markings. If they are missing, the gear is not compliant and not safe.
Fit isn’t just about comfort; it’s about function. Ill-fitting gear can be as dangerous as no gear at all.
- Safety Helmets A hard hat should feel snug and secure. Adjust the suspension so it sits level on your head without wobbling or tilting. You should be able to bend over without it falling off, even before fastening a chin strap.
- Work Boots Always try on boots at the end of the day when your feet are slightly swollen, and wear the same thick work socks you use on the job. There should be about a half-inch of space between your longest toe and the end of the boot. Walk around to check for any pinching or heel slippage.
- Harnesses For fall protection, leg straps should be snug enough that you can only fit a flat hand between the strap and your leg. The chest strap should sit high on your chest, and the back D-ring should be positioned between your shoulder blades. Try on harnesses over the clothes you’ll actually be wearing, whether it’s a t-shirt or a bulky winter coat.
When assembling your kit, prioritize items based on risk. Your head, eyes, and feet are almost always at high risk on any site, so a certified helmet, safety glasses, and protective boots are non-negotiable. Hearing protection and gloves follow closely behind. Items like respirators or fall protection harnesses are critical but may be task-specific. Balancing your budget with performance is a common challenge. A heavier, steel-toed boot might be cheaper, but a lighter composite-toe model could reduce fatigue over a long shift, making it a worthwhile investment. Similarly, a reusable elastomeric respirator has a higher upfront cost than disposable N95s but can be more economical and comfortable for daily, prolonged use. Don’t just look at the price tag; consider the cost of discomfort, non-compliance, or potential injury.
Taking care of your gear is as important as buying the right equipment. **Proper storage is critical:** keep your PPE in a clean, dry, and cool place away from direct sunlight, chemicals, and moisture. A locker or dedicated gear bag is ideal, not the dashboard of your truck, as UV rays degrade plastics in hard hats and fade high-visibility clothing. Hang fall protection harnesses to prevent creasing, and store clean respirators in a sealed bag or container. For **cleaning**, always follow the manufacturer’s instructions. Most equipment can be cleaned with mild soap and water; never use harsh solvents unless specified, as they can damage protective materials. For elastomeric respirators, disassemble them and wash the facepiece with warm water and mild soap, letting all parts dry completely before reassembly. Finally, track **service life**. Check the manufacturer’s guidance and the “born-on” date stamped into hard hat shells; they should typically be replaced within five years, with the suspension replaced annually. Keeping a simple record of purchase and expiration dates will help you stay on schedule.
When it’s time to buy, stick to reputable sources. Your employer may supply everything you need. If not, purchase from authorized distributors or certified PPE sellers. These suppliers can provide technical data sheets and confirm that the products are genuine. Be cautious when shopping online. Red flags include missing certification information in the product description, unusually low prices, and vague seller profiles with dubious reviews. If a deal seems too good to be true, it probably is. Your safety is worth the extra diligence.
Here are a few sample starter kits to guide you, prioritized by general risk.
General Laborer Starter Kit Checklist
- High Priority ANSI Z89.1 Type I hard hat, ANSI Z87.1 safety glasses, ASTM F2413 steel or composite toe work boots, general-purpose gloves with some cut resistance (ANSI A2-A3).
- As Needed Hearing protection (earplugs or earmuffs), NIOSH-approved N95 respirator for dusty tasks, ANSI/ISEA 107 Class 2 high-visibility vest.
Carpenter Starter Kit Checklist
- High Priority ANSI Z89.1 hard hat (consider Type II for lateral protection), ANSI Z87.1 safety glasses or goggles, high-dexterity gloves with good cut resistance (ANSI A3-A4), ASTM F2413 work boots with puncture resistance.
- As Needed Hearing protection for power tool use, NIOSH-approved respirator for cutting treated wood or engineered materials, fall protection harness and lanyard for work at height.
Electrician Starter Kit Checklist
- High Priority ANSI Z89.1 Class E (Electrical) hard hat, ASTM F2413 Electrical Hazard (EH) rated work boots, ANSI Z87.1 safety glasses.
- As Needed/Task-Specific Voltage-rated insulated gloves with leather protectors (critical for live work), arc-rated (AR) clothing, fall protection harness.
Frequently Asked Questions about construction PPE
Even with the best buying guide, practical questions always pop up on the job site. This section tackles the most common ones we hear from workers and supervisors. Think of it as your quick-reference guide for maintaining, using, and understanding your gear after you’ve bought it.
How often should I replace my hard hat?
There isn’t one single expiration date for all hard hats, but there are clear rules to follow. The suspension system (the inner harness) should typically be replaced every 12 months. The outer shell usually has a service life of three to five years from the date of first use. However, you must replace any part of the hard hat immediately if it sustains an impact, even if there’s no visible damage. UV light, chemicals, and extreme temperatures can also weaken the plastic over time.
Quick Inspection: Before each use, check the shell for cracks, dents, discoloration, or a chalky texture. Squeeze the suspension straps to ensure they are pliable and not brittle. Check that the adjustment mechanism works smoothly.
Next Action: Find the manufacturer’s date stamp inside your helmet. Note the date you first put it into service and follow the replacement schedule in the user manual.
What does NRR mean and how do I choose hearing protection?
NRR stands for Noise Reduction Rating. It’s a number in decibels (dB) that estimates how much a hearing protection device will reduce noise exposure in a laboratory setting. A higher NRR generally means more protection. However, the real-world effectiveness depends entirely on a proper fit. For construction, hearing protection is required when noise levels average 85 decibels (dBA) over an 8-hour shift. The choice between earplugs and earmuffs often comes down to the noise level, comfort, and compatibility with other PPE like hard hats and safety glasses.
Quick Inspection: Check disposable foam plugs to ensure they are clean and expand fully. Inspect reusable plugs and earmuff seals for cracks, tears, or hardening.
Next Action: Ask your safety manager for the site’s noise exposure data to ensure your NRR is sufficient. Practice inserting earplugs correctly; an improper fit can cut their effectiveness by more than half.
Can I use safety glasses instead of goggles for dusty work?
No, safety glasses are not a substitute for goggles in environments with significant airborne dust, debris, or chemical splash hazards. Safety glasses protect from impacts coming from the front, but they have gaps on the sides, top, and bottom. Goggles form a protective seal around your eyes, preventing fine particles like concrete dust or sawdust from getting in.
Quick Inspection: When wearing goggles, check in a mirror to ensure the seal is flush against your face with no gaps. Ensure the strap provides a snug but comfortable fit.
Next Action: Consult the Job Hazard Analysis (JHA) for your task. If it specifies dust, splash, or fine particle hazards, use ANSI Z87.1-rated goggles with indirect venting to reduce fogging.
When are respirators required and what is fit testing?
Respirators are required whenever engineering controls (like ventilation) and work practices cannot keep airborne contaminants below OSHA’s Permissible Exposure Limits (PELs). This is common when working with silica, lead, certain solvents, or heavy dust. Fit testing is an annual OSHA requirement that ensures a tight-fitting respirator, like an N95 or a half-mask, forms a perfect seal with your face. Without a seal, contaminated air can leak in. The test can be qualitative (using your sense of taste or smell) or quantitative (using a machine to measure leakage).
Quick Inspection: Before each use, check the respirator’s straps for elasticity, inspect the facepiece for damage, and ensure inhalation/exhalation valves are clean and working.
Next Action: If you are required to wear a tight-fitting respirator, your employer must provide a medical evaluation and schedule an annual fit test for you. Do not perform work requiring a respirator until you are successfully fit-tested.
How do I know my boots meet safety standards?
Certified safety boots will have a label on the inside of the tongue or cuff that specifies the standards they meet. Look for “ASTM F2413”. This is the primary US standard for protective footwear. The label will also have codes indicating the specific protection offered, such as “I/75” for impact resistance, “C/75” for compression resistance, and “EH” for Electrical Hazard protection.
Quick Inspection: Daily, check your boots for sole separation, deep cuts or punctures in the upper material, and excessive tread wear that could compromise slip resistance.
Next Action: Check the tag inside your current work boots. If you can’t find an ASTM F2413 label, they are not certified safety footwear and should be replaced.
Who pays for PPE? Employer or employee?
OSHA is very clear on this. Employers are required to pay for most required PPE. This includes non-personal items like respirators, hard hats, fall protection harnesses, and specialty gloves. A key change with the OSHA rule effective January 13, 2025, is the explicit requirement for employers to provide properly fitting PPE, which reinforces their responsibility. There are a few exceptions. Employers are generally not required to pay for everyday clothing, weather-related gear, or non-specialty safety-toe footwear if the employee is allowed to wear them off the jobsite.
Quick Inspection: Review your pay stub to ensure no deductions are being made for required PPE.
Next Action: If you are being asked to pay for required PPE, discuss the policy with your supervisor or HR department, referencing your employer’s responsibility under OSHA regulations.
Are high-visibility vests always required for construction sites?
Not on every square inch of every site, but they are required for any worker exposed to vehicle or equipment traffic. This includes working in or near roadways, directing traffic, or working around heavy equipment like excavators and cranes. The specific “Class” of the garment (Class 1, 2, or 3) depends on the speed of nearby traffic and the complexity of the work environment. Most construction sites require at least Class 2.
Quick Inspection: Hold your vest up. Is the fluorescent background material faded or dirty? Are the retroreflective stripes cracked, peeling, or worn? If so, its effectiveness is reduced, and it should be replaced.
Next Action: Confirm your site’s specific high-visibility requirements with your safety manager. The rules can vary depending on your location and proximity to traffic.
Can PPE items be customized with company logos?
It depends on the item. Adding logos to high-visibility vests or work shirts is usually fine, as long as the logo doesn’t cover up too much of the required fluorescent or reflective material. However, you should never paint or apply unauthorized stickers to a hard hat. The chemicals in paint and adhesives can weaken the plastic shell and void its ANSI certification. The same goes for fall protection harnesses; never write on the webbing with markers.
Quick Inspection: Look at your hard hat. Are there any non-manufacturer stickers or paint on it?
Next Action: If you want to customize a hard hat, order it directly from the manufacturer with the logo already applied. For any other gear, get written confirmation from the manufacturer that your planned customization will not affect its safety certification.
Conclusions and practical next steps
We’ve covered a lot of ground, from the specifics of helmet classifications to the nuances of glove materials. Now it’s time to bring it all together and turn knowledge into action. Having the right personal protective equipment is the first critical step, but building a sustainable safety culture depends on how you select, manage, and maintain that gear. This final chapter provides a clear path forward, synthesizing our key recommendations into a practical plan for assembling or auditing your PPE starter kit.
The foundation of your safety rests on a mandatory starter kit, which at a minimum includes a hard hat, safety eyewear, work boots, gloves, and hearing protection. This is your non-negotiable baseline. From there, your specific job tasks, as identified in your site’s hazard assessment, will dictate the need for additional gear like respirators, high-visibility apparel, or fall protection systems. The effectiveness of every single item, from the baseline to the specialized, hinges on four core principles.
First is fit. This has always been important, but as of the OSHA rule change effective January 13, 2025, it is an explicit legal requirement. PPE that is too loose can snag or fall off, while gear that is too tight can restrict movement and create new hazards. Second is certification. Always look for the markings from ANSI, NIOSH, or ASTM on your equipment. These codes are not suggestions; they are your guarantee that the gear has been tested to withstand the specific hazards it was designed to protect against. Third is compatibility. Your hard hat, earmuffs, and safety glasses must work as a system. A respirator that breaks the seal on your eyewear is useless. Always check that your different pieces of PPE can be worn together without compromising the function of any single item. Finally, there is maintenance. Dirty, damaged, or expired gear is a liability. Regular inspection, cleaning, and proper storage are essential to ensuring your PPE performs when you need it most.
Your employer carries the legal responsibility for providing and paying for all required PPE. They are also obligated to train you and your crew on how to properly use, inspect, and care for it. This partnership between employer provision and employee diligence is what makes a safety program work. To help you put these principles into practice, here is a prioritized action plan to build or refine your PPE program.
-
Perform a Hazard Walk-Through
Before you buy anything, you must understand your risks. Walk the site with your team and conduct a Job Hazard Analysis (JHA) for every major task. Document the specific dangers present, whether they are falling objects, airborne dust, high noise levels, or chemical exposures. This analysis is the blueprint for your PPE selection; it tells you exactly what you need to protect against. -
Inventory and Audit Your Current Gear
Gather every piece of PPE you and your crew currently use. Lay it all out and inspect each item individually. Look for cracks in helmets, deep scratches on safety glasses, worn-out treads on boots, and frayed webbing on harnesses. Check the manufacturing dates on hard hats and fall protection, as many have a limited service life regardless of appearance. Create a simple log and mark each item as “pass,” “fail,” or “needs cleaning.” -
Replace, Repair, or Upgrade Immediately
Anything that failed the audit must be removed from service right away. Cut the straps on old harnesses and crush damaged hard hats to ensure they cannot be accidentally used again. Use the buying guides in this article to select certified, high-quality replacements. This is also the perfect time to upgrade gear based on feedback from your crew about comfort and functionality. -
Schedule Professional Fit Testing
For any job requiring tight-fitting respirators, such as N95s or half-mask elastomeric respirators, professional fit testing is mandatory. It must be done annually or anytime an employee has a significant physical change. Don’t stop there. Use this opportunity to conduct informal fit checks for other gear. Ensure harnesses are sized correctly and that safety glasses provide full coverage without gaps. -
Conduct and Document Training
Hold a dedicated toolbox talk or safety meeting focused on PPE. Go beyond just handing out new gear. Demonstrate how to perform a pre-use inspection, how to properly don and doff a respirator and perform a user seal check, and how to clean and store equipment. Document who attended the training and what topics were covered. This creates accountability and reinforces good habits.
To ensure these actions have a lasting impact, establish a system for recordkeeping and periodic reviews. This doesn’t need to be complicated. A simple binder or digital folder can work. Your records should include:
- Job Hazard Analyses for different site tasks.
- PPE issuance logs showing who received what equipment and when.
- Inspection logs for critical items like fall protection and electrical gloves.
- Fit test certificates for all employees using respirators.
- Training rosters with dates, topics, and attendee signatures.
Set a cadence for reviewing your program. Pre-use inspections should happen daily by the user. Supervisors should perform informal spot-checks weekly. A formal, documented audit of your entire PPE program, including your JHA and inventory, should be conducted at least once a year or whenever a new major task or hazard is introduced to the site.
Ultimately, viewing personal protective equipment as a safety investment rather than a business expense is the key to a safer worksite. The cost of a new hard hat or a properly fitting harness is insignificant compared to the cost of a serious injury, both in financial and human terms. Always defer to the manufacturer’s instructions for use and care, and ensure every action you take aligns with your site-specific safety plan. Your gear is your last line of defense; make sure it’s one you can trust.
Sources
- OSHA Updates PPE Fit Requirements for Construction Workers — The revised standard will go into effect on Monday, Jan. 13, 2025. According to a DOL news release, the revision to the standard adds specific …
- OSHA Guidelines PPE for Construction: Essential Safety Gear — New OSHA Rule on PPE Fit (Effective January 13, 2025) · Hard hats · Gloves · Goggles and safety glasses · Safety shoes · Welding helmets · Hearing …
- Personal Protective Equipment – Construction – OSHA — The change aligns the construction industry standard with the standard already in place for general industry. The Final Rule is effective January 13, 2025.
- What the New OSHA Construction PPE Rule Means for Your Jobsite — PPE must be of safe design and construction for the work performed. PPE must be selected to properly fit each affected employee. Employers must …
- OSHA Will Soon Require Construction Employers to Consider Body … — Starting in January 2025, OSHA will require that employers ensure PPE – such as hard hats, safety harnesses, gloves, and protective footwear – …
- OSHA Issues Final Rule on Personal Protective Equipment for … — On December 11, 2024, OSHA finalized a rule requiring construction employers to provide properly fitting PPE, effective January 13, 2025, …
- OSHA's Final Rule: Fitting PPE Standards into Your Construction … — OSHA's Final Rule explicitly requires businesses in the construction industry to provide workers with personal protective equipment (PPE) that fits properly.
- Department of Labor finalizes rule on proper fit requirements … – OSHA — The final rule explicitly requires the equipment to properly fit any construction worker who needs it, improving protections from hazardous conditions.
- OSHA New Standard for Construction Workers Effective January 2025 — The new OSHA rule requires construction employers to provide PPE that fits workers' unique body types, ensuring better safety and comfort. This …